FAQs

How long will F-Scan64 sensors last?

Sensor usage is dependent upon application. Typically, you can expect up to up 20 uses, assuming 20-30 steps per trial in-shoe without orthotics. 


Link to this FAQ

How to install T-Scan 10 when getting a dll error?

Problem:
While installing T-Scan 10 on some Windows 7 or Windows 8.1 systems, you may get this error:
"Could not load file or assembly tlllWin32.dll or one of its dependencies".

Solution:
Download and install Microsoft Visual C++ 2015 Redistributable (x86) - 14.0.24123
This patch is also available on our website:

http://download.tekscan.com/public/redist/2015U3vc_redist.x86.exe


Link to this FAQ

Upgrading T-Scan to Version 10

Once you have installed Microsoft SQL (click here if you haven't), you can upgrade your T-Scan to v10. When you upgrade to v10 the first time, your previous database from v9, v8 etc. will be automatically migrated from MS Access to MS SQL. This process is a one-time only step done in the background during the upgrade.

Please click on one of the icons below that best describes your setup. Instructions will appear below.

Questions or concerns? Contact Tekscan Technical Support at support@tekscan.com or +01.617.464.4279.

Local Configuration

v10 local config icon

Network Configuration

v10 network configuration icon

Local Configuration

If you plan to run T-Scan in a local configuration where your patient list is only accessible to one operatory workstation or a traveling laptop, follow these instructions.

Instructions

  1. Go to one of the T-Scan computers, open T-Scan, and click on "Help > Update" as shown below. If you don't see Update listed at the bottom of this menu and expect to have an upgrade pending, contact Technical Support.

  2. Follow the on-screen instructions, clicking Next on all screens to accept the default locations.

  3. Repeat steps 1-2 for additional operatory computers.

Download Instructions as PDF

Network Configuration

Use these steps to update T-Scan on workstations that share a networked database. Note: You must have purchased a Network License Add-on to enable this functionality. The first workstation you upgrade must be one that is currently using a networked T-Scan database for the database migration to be successful!

Each T-Scan application must point to the location where you placed your networked database. Since the location of the networked database will vary by dental practice, these instructions are a little more involved than the local configuration. We would remove these steps if we could!

Instructions

  1. Go to one of the T-Scan computers, open T-Scan, and click on "Help > Update" as shown below. If you don't see Update listed at the bottom of this menu and expect to have an upgrade pending, contact Technical Support.

  2. Follow the on-screen instructions. When prompted to select the Database Server, click "Browse" and select the correct SQL Server/Instance name which was displayed in Step 5 when you installed SQL on your server.

  3. You should see the suffix "TSCAN10" as shown below. Then click "OK".

    Note: If no database servers are listed in this dialog, then you will need to type in the path "server_name\TSCAN10" manually and click next.

  4. Now that you have identified the database server, click "Next".

    Note: If you receive SQL errors, you will likely need to open a static TCP port in your server firewall for the TSCAN10 instance – click here for instructions.

  5. When prompted to select where to save scans on the network, click "Browse" (or directly type the path). Point to the Scans folder on the database server you installed earlier (Step 5 of installing SQL. DELL-1SXY7V1\Scans in this example). Then click "Next".

  6. Continue with the update process until the installation is finished.

  7. Repeat steps 1-6 for additional operatory computers, being sure to point to the correct Database and Scans locations in steps 4 & 5. All patient files should be accessible from that point forward.
  8. Double check on each operatory by opening the software, going to Help > Technical Support, and ensuring Database Location and Scans Save Folder are both pointing to the correct locations.

Download Instructions as PDF

Link to this FAQ

How to Open a Static TCP Port

If you have a Network License for T-Scan and the Browse dialog for selecting your networked database while updating T-Scan is empty, then you likely need to manually open a static TCP port in your Windows firewall to gain access to the networked T-Scan database.

  1. Log into your server that is hosting the T-Scan database and open your server’s SQL Configuration Manager.
  2. Select "SQL Server Network Configuration" on the left and then double click on "Protocols for TSCAN10" on the right.
  3. Double click on "TCP/IP"
  4. Select the "IP Addresses" tab and scroll to the bottom. Set "TCP Dynamic Ports" to "0" and "TCP Port" to "51444" as shown below, then click Apply.
  5. Click OK when you receive the following warning.
  6. Select "SQL Server Services" on the left and "SQL Server (TSCAN10)" on the right.
  7. Click on the Restart icon to stop and restart the SQL service.

  8. Verify that the SQL Service is restarted and running
  9. Return to operatory workstation and verify T-Scan can see the database on the network.

Download Instructions as PDF

Link to this FAQ

Unhandled Exception Error

Problem: The following "Unhandled Exception" error comes up when the new T-Scan is started:


Solution:

  1. Plug in the USB handle and wait a few seconds, so the correct handle drivers are installed.
  2. Start the T-Scan software and confirm the above error is gone.
  3. Now it's OK to start T-Scan without the handle. It would not force an unhandled error, as the drivers are already installed.

Link to this FAQ

How to install T-Scan 10 software over a network?

Network installation is an optional feature, which requires an additional licensing fee to run T-Scan™ software on multiple computers linked to a single network database. The network database installation screen, described below, will only be available with software that has the network license. Please contact Tekscan for more information.

SERVER INSTALLATION

Note: For T-Scan Version 10 only! Run the T-Scan setup on the actual server that you want to have host your patient files and install the database.

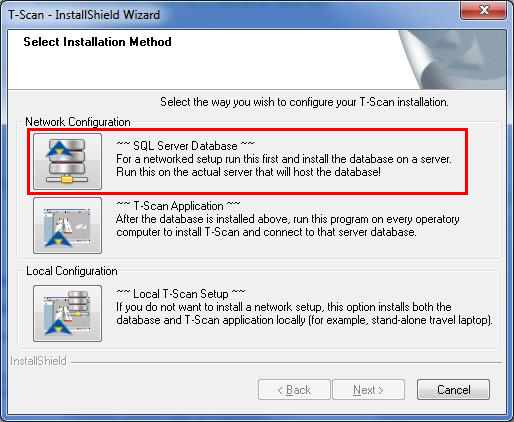
1. Put software CD into the server’s CD drive or run the software from the provided link. The Installation program opens automatically. Click Install Software

2. Select SQL Server Database and follow the on-screen instructions.

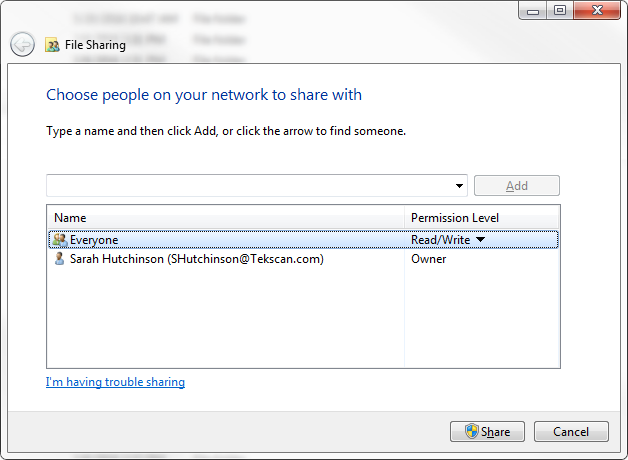
3. Once complete, navigate to the C:\Tekscan folder, select the Scans sub-folder, right click and select Share With. Add Everyone and adjust the Permission Level to Read/Write. For stricter network security, add individual user accounts instead of Everyone. Click Share, and then Done.

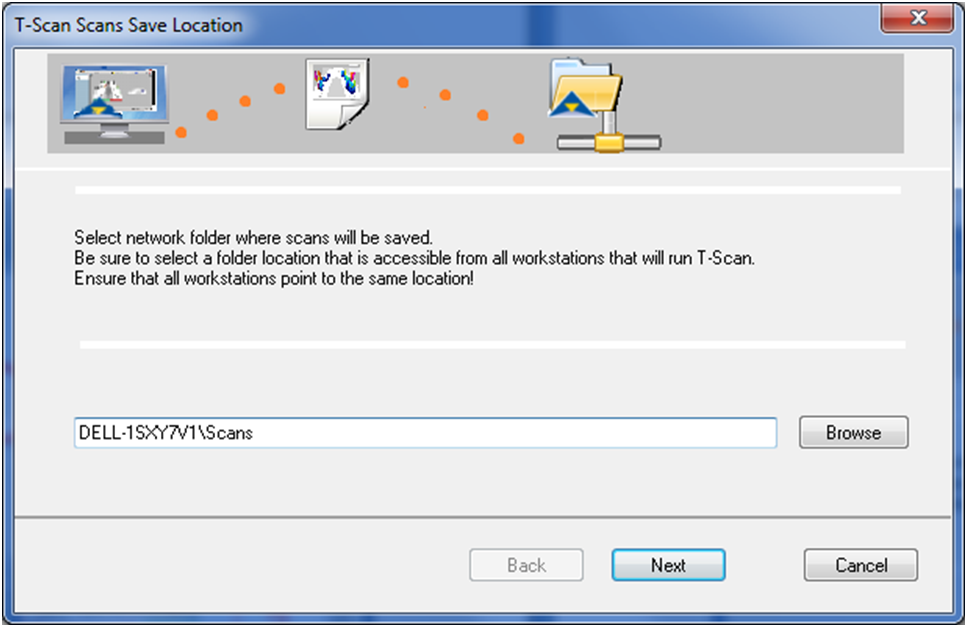
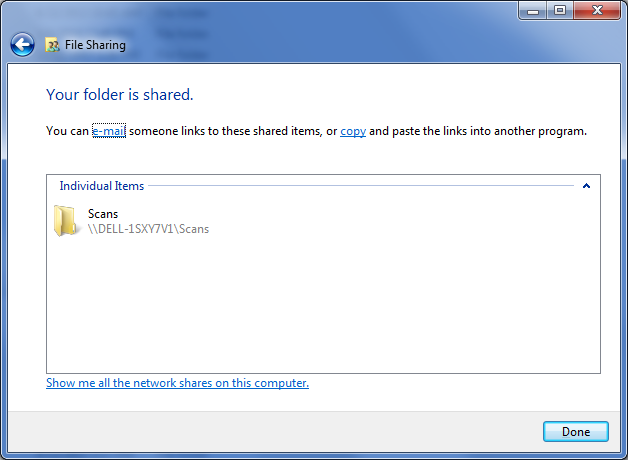
4. You will see a dialog like the one below. Take note of the server path (\\Dell-1SXY7V1\Scans in this example), as it will be critical that you select / enter this path during software installation on each operatory computer.

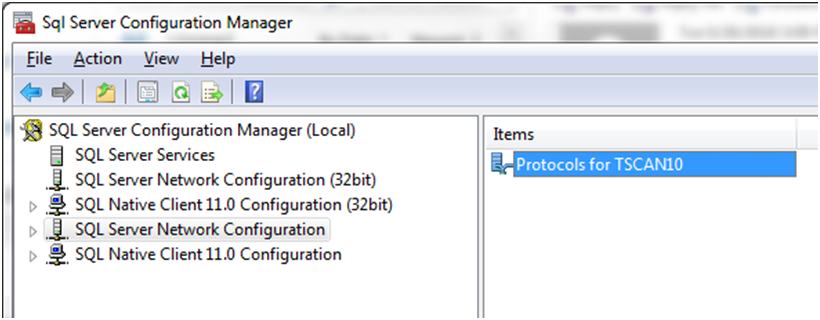
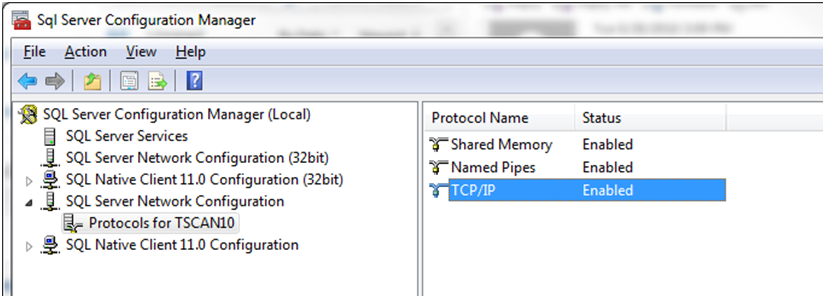
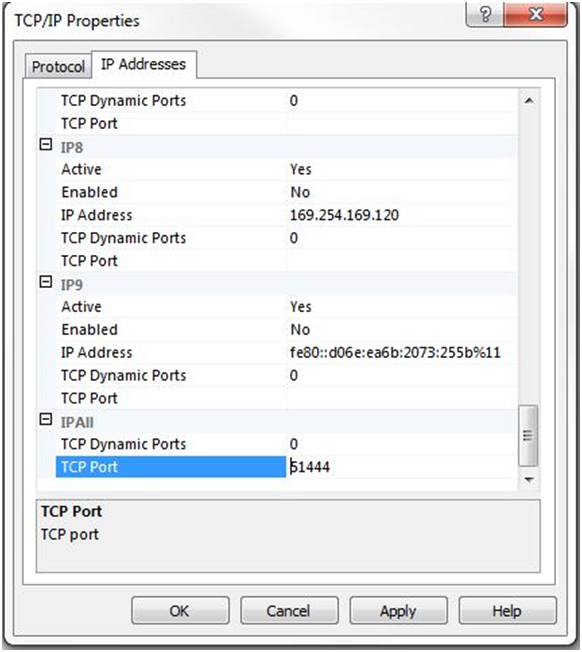
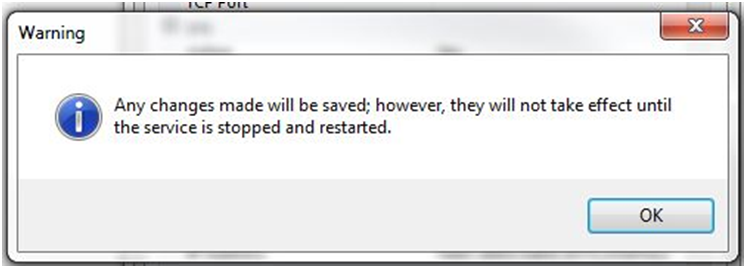
Note: Your Network Administrator needs to setup static TCP port for TSCAN10 instance, then open the server firewall for that port, in addition to UDP port 1434.


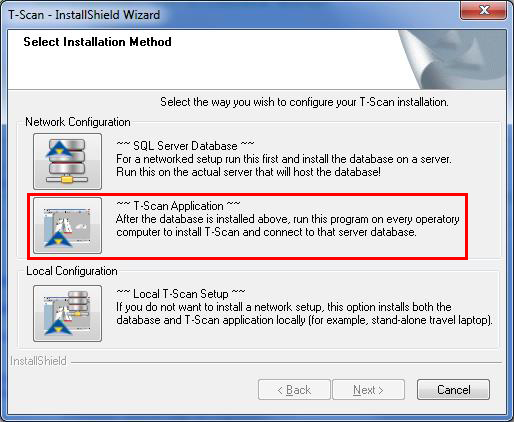
OPERATORY INSTALLATION

5. Go to the computer on which you wish to run T-Scan and run the setup, this time selecting T-Scan Application.

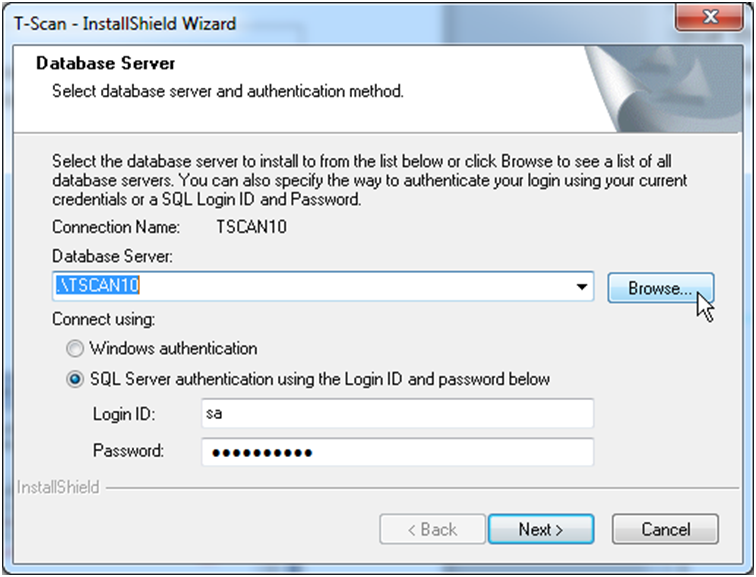
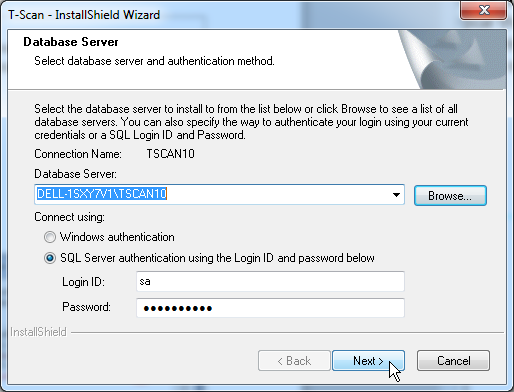
6. Follow the on-screen instructions. When prompted to select the Database Server, click Browse and select the correct SQL Server/Instance name which should have the suffix “TSCAN10.”

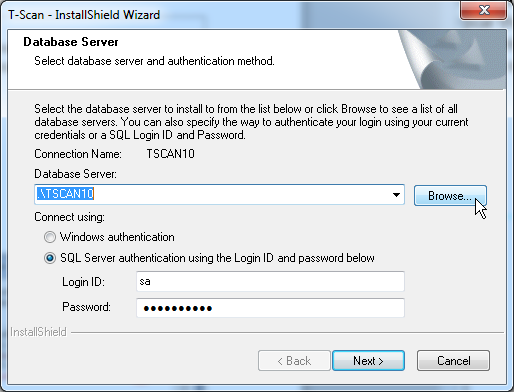
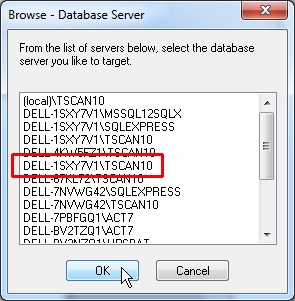
Note: If the TSCAN10 instance is not advertised above, just enter “server name\TSCAN10” and click Next.

7. When prompted to select where to save scans on the network, click Browse (or directly type the path). Point to the network folder you shared on the database server earlier (DELL-1SXY7V1\Scans in this example).

8. Repeat steps 5-7 for additional operatory computers, being sure to point to the correct Scans location on the network. All patient files should be accessible from that point forward.

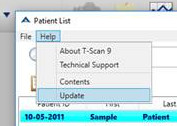
9. Double check on each operatory by opening the software, going to Help > Technical Support, and ensuring Database Location and Scans Save Folder are both pointing to the correct locations.

Link to this FAQ

How Can I Track My Website Order?

Online tracking is available for all website orders.

When your package ships you will receive an email from our Orders Department that includes a tracking number and link.

You may track the package by pasting the tracking link in a web browser, pasting the tracking number at https://www.ups.com or by calling UPS.

If you did not get a tracking number then please contact us at orders@tekscan.com or call us at 800.248.3669 / 617.464.4500 x410 Monday through Friday, 8am - 4pm EST.

Link to this FAQ

What Are Your Shipping Rates for Website Orders?

Our shipping rates depend on region and method. We use UPS for our webstore.

Note that UPS international shipping rates to our customers outside of North America, specifically in Europe or Asia have increased substantially in recent years.

There may be options via our local Tekscan distributors for some standard products. Contact us for details.

Shipping costs are subject to change at any time, and do not include any customs or clearance charges.

UPS does not deliver to APO, FPO or PO boxes. If entered then we will contact you for a street address.

Taxes are charged for shipments to Massachusetts, California, and Washington state, and other locations subject to regional requirements.

Link to this FAQ

What Shipping Methods Do You Offer for Website Orders?

UPS

Tekscan's preferred carrier for website orders is UPS.

We rely on UPS' large international network for timely delivery of packages.

Delivery time for packages depends on two factors – processing time and shipping time.

Processing time is the time it takes for an order to leave our facility in South Boston, which is usually 2-3 business days.

Shipping time is the time the package takes in transit to its destination. This number can vary widely and is dependent on many factors such as the shipping method chosen, the ship-to country, and more.

Link to this FAQ

Reinstalling the T-Scan Handle Drivers

Sometimes you cannot run a New Scan, indicating a possible driver issue with your Evolution™ handle.

To reinstall the drivers, please go C:\Tekscan\TScan\Drivers and double-click (run) Install Tekscan Evolution USB driver.

Reinstall T-Scan driverse

Restart T-Scan™ when done and see if this fixes the new scan issue.

Link to this FAQ